Create Options Page
As far as we are aware almost all websites require contact information. So let's create an options page for website contacts as an example
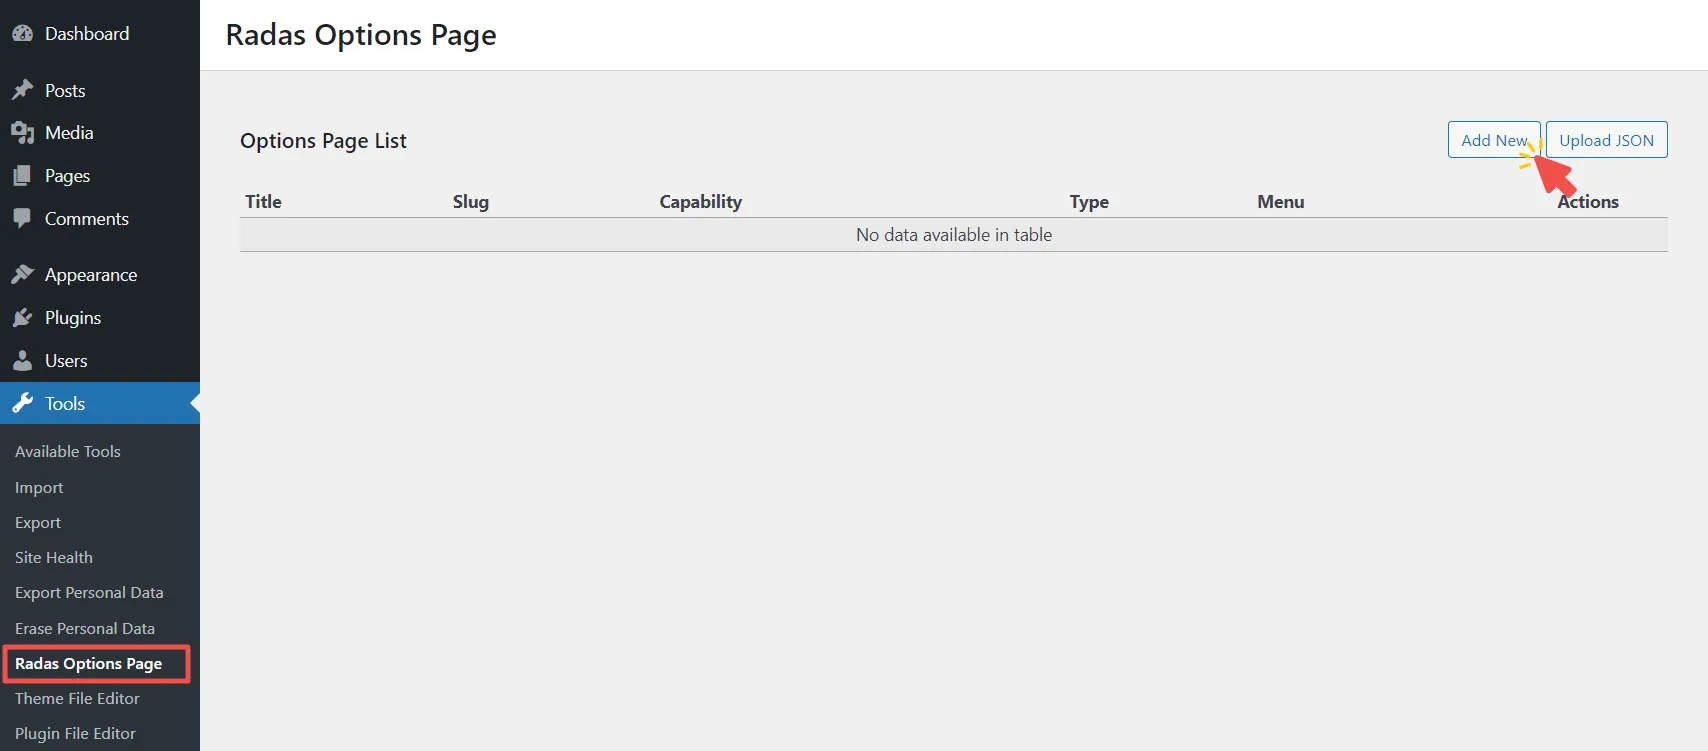
Add New Options Page
To create options page, go to Tools > Radas Options Page, then click Add New:
You will see the screen to input options page settings, for the detail explanation of page settings you can find here 👉🏼 Options Page Settings
Set Page Settings
Now let's input the page settings as below:
Page Title: Web Contact
Slug: rds_web_contact
Menu Title: Web Contact
Leave other settings at default, then click + New Field

To avoid conflict, make sure you use your own prefix in the slug setting
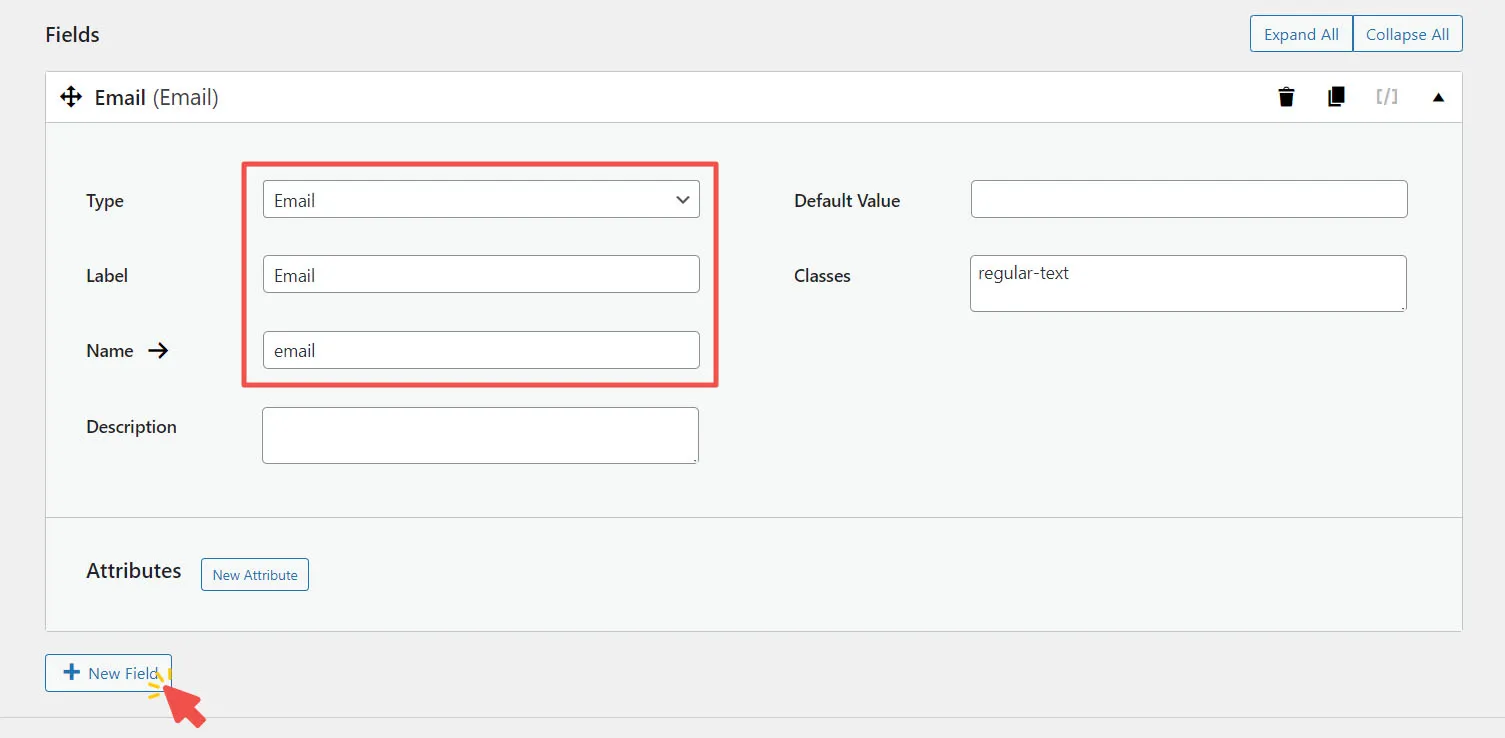
Set Fields Settings
After we clicked + New Field, field settings section will appear. let's create fields for phone, email, and address:
Email Field
Settings for email field:
Type: Email
Label: Email
Name: email
Leave other settings at default, then click + New Field
Phone Field
Settings for phone field:
Type: Phone
Label: Phone
Name: phone
Leave other settings at default, then click + New Field

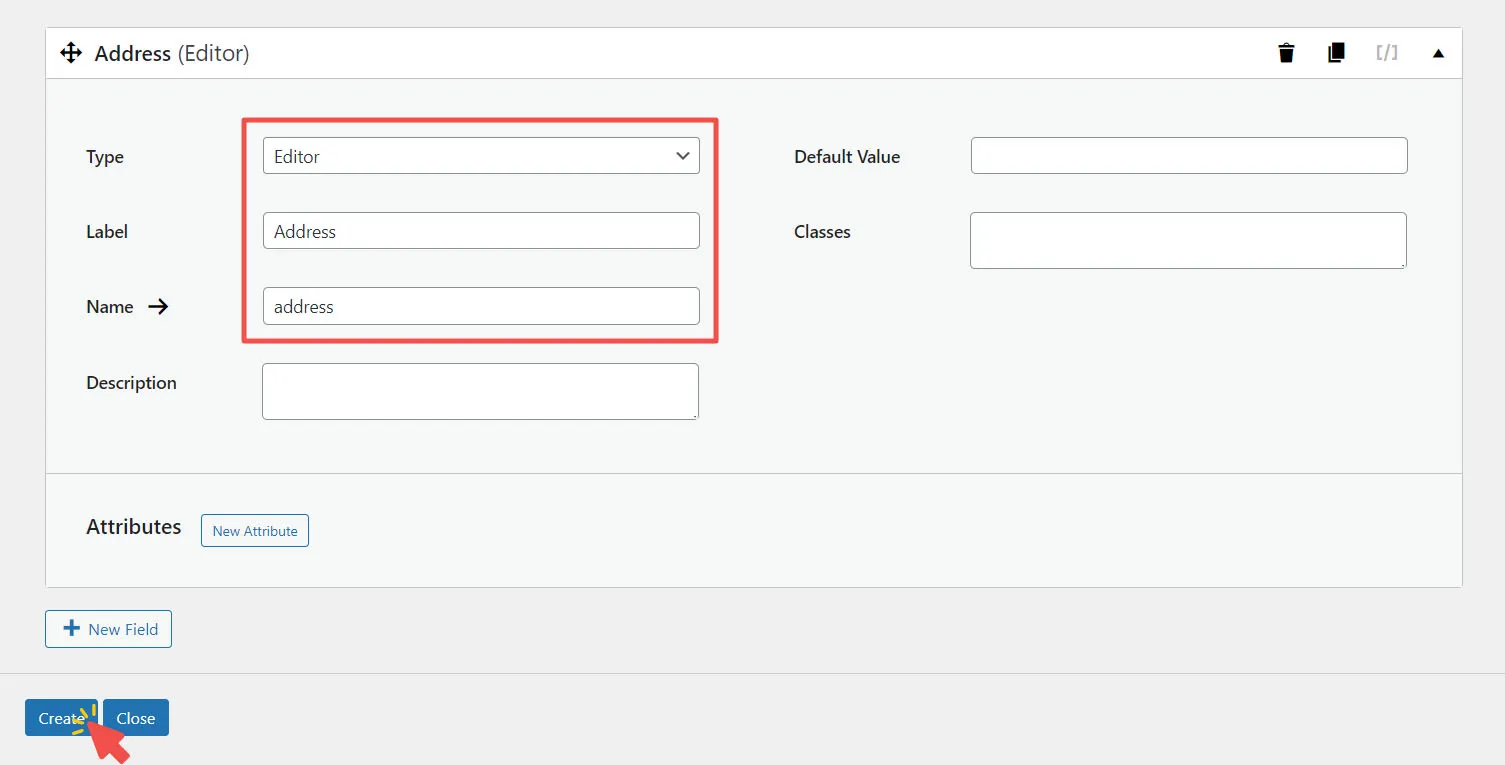
Address Field
Settings for address field:
Type: Editor
Label: Address
Name: address
Leave other settings at default, then click Create
You can click the right arrow icon next to the Name label to generate field name

For the detail explanation of field settings you can find here 👉🏼 Options Field Setting
Open Options Page
Now click Close button to see the list of created options page, and click the top-right arrow icon on the list to open the options page.
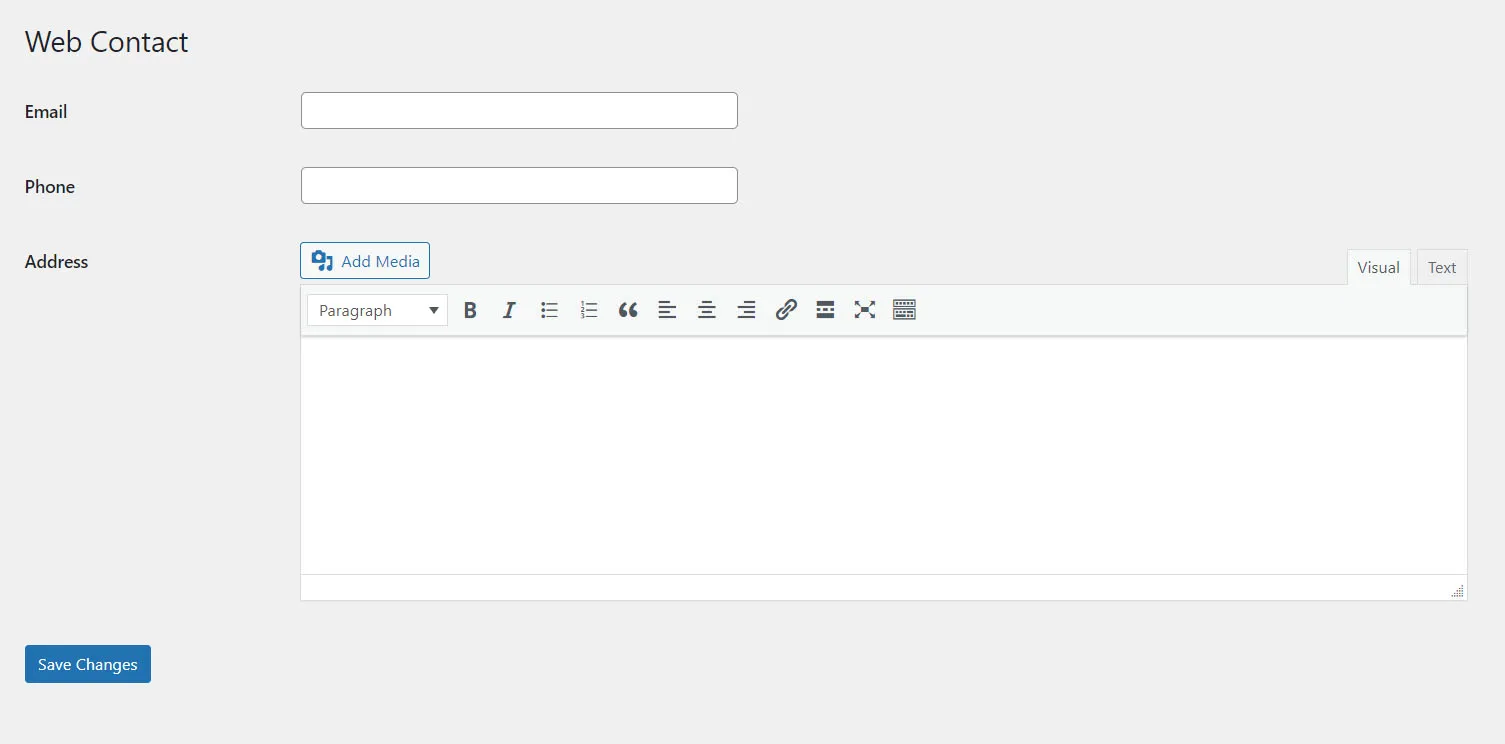
Congratulation! your options page is ready.